- Maximum height for the NCC Print Shop printer is 42"; maximum width is 90"
- Poster size for the Rall Symposium or the Summer Undergraduate Research Colloqium is 48"×36"
- Check the NCUR site for the current year's size; for meetings of professional societies, check the conference Web site or ask your advisor about poster size
- Construct your poster as a single PowerPoint slide
- Print the PowerPoint slide to a PDF file
- Upload your PDF to the Print Shop using their online form
- Cost of printing a poster (subject to change; price is current as of Spring 2015) is $2.75 per square foot
- Allow at least a day or two for the poster to be printed.
- For heavy-use times like Rall and NCUR, the Print Shop will establish a specific deadline (usually a week or so in advance)
- You can find extensive (!) suggestions on poster design here or you can even upload it to get comments from others
Setting Up the Poster in PowerPoint:
- Open a new presentation
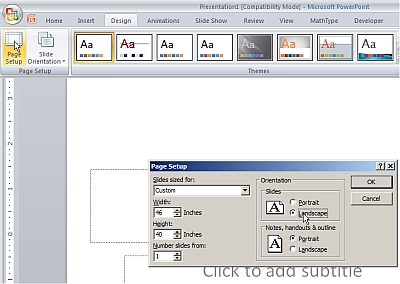
- Click Design | Page Setup to get the Page Setup dialog box (see screenshot)
- Set the desired width and height for your poster
- Most posters are wider than they are tall; if this is the case, choose Landscape
- The largest slide that PowerPoint will allow is 56" × 56"; if you need to make a larger poster, you will have to scale it down proportionately. For example, to make a 90" × 42" poster, you would have to set up a 45" × 21" PowerPoint slide.
- Click the title and subtitle boxes that PowerPoint inserts automatically and delete them.
- A very basic template that you can modify if you want is here.
Designing the Poster:
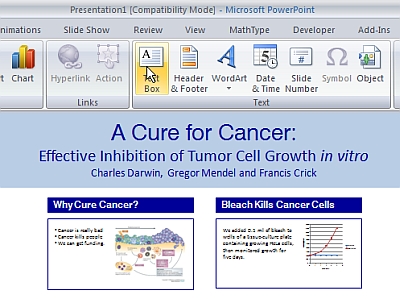 Use
text boxes (click Insert | Text
Box) to add text to your poster.
Use
text boxes (click Insert | Text
Box) to add text to your poster. - Remember that your poster needs a title, and that the authors' names should also be included. In addition to your own name, include your mentor or research advisor and anyone else who collaborated with you (on the specific work you are presenting).
- Hint: Your poster should be readable from a distance! As a guide, 72-point text will print about 1" high; a size between 108 and 144 points is good for a title, while a 48- to 60-point font is good for subheadings and body text between 24 and 36 points is readable from a good distance.
- Hint: Don't use too much text! No one is going to have time to read all the words on your poster. Remember, your audience should be able to read all of the important points from a distance.
- Copy and paste graphs, diagrams and photographs from other programs to tell your story, or use Insert | Picture to import a saved graphic. You can use PowerPoint's drawing tools (Home | Shapes) to draw a diagram directly on your slide or you can draw the diagram separately and import it.
- Hint: Your poster should be visual! Show your audience what you want them to see, rather than expecting them to read about it. You are not limited to the formal Introduction-Methods-Results-Discussion format of a scientific paper, so feel free, for example, to use a diagram to illustrate a method and then put a graph of the results right into the diagram. Focus on how to make it easy for the audience to understand your work.
- Use subheadings, boxes, lines and other visual tools (Home | Shapes) to make it easier for your audience to follow the flow of the poster and add visual interest.
- Be sure your poster is exactly the way you want it! Mistakes look pretty embarassing in 36-point type. Proofread, proofread, proofread—then ask someone else to proofread it for you.
- To judge readability and visual effect, try printing the slide as big as possible on an 8½×11 sheet and/or projecting it on one of the classroom projectors. You may not be able to read all your text, but you will be able to get a good idea of how the poster looks overall.
- PowerPoint 2007 or 2010 can directly save your presentation as a PDF file: use Save As and change the file type to PDF. Make sure you saved it as a PowerPoint file first, so you can make changes later!
- If you are using your own computer and you don't have Office 2007 or 2010, you will need to install a PDF printer driver. A free one that works very well (better, in fact, than the built-in conversion in Office) is PrimoPDF. After downloading and installing this program, when you choose to print your poster, one of your printer choices should be PrimoPDF. Print to that "printer" and choose a location in which to save your PDF file.
- Upload your PDF file to the Print Shop using their online form and you're all set!